前提条件:仅A30、A100、H100支持MIG 硬件切分。
一、硬件切分
1. 检查GPU驱动是否已安装成功;
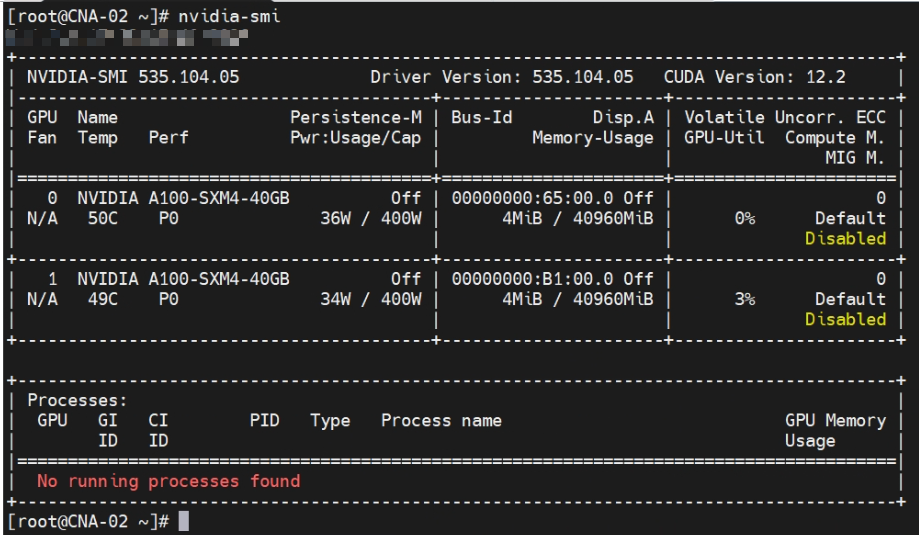
2. 开启 MIG 模式 (需要重启 GPU 或节点)
 如图,如果GPU被某些进程占用,则执行会告警,必须找到对应进程结束停止占用。
 出现此内容,代表开启成功,因为有两张A100, 输出两次。
关闭命令:
3. 查看支持的 Profile ID
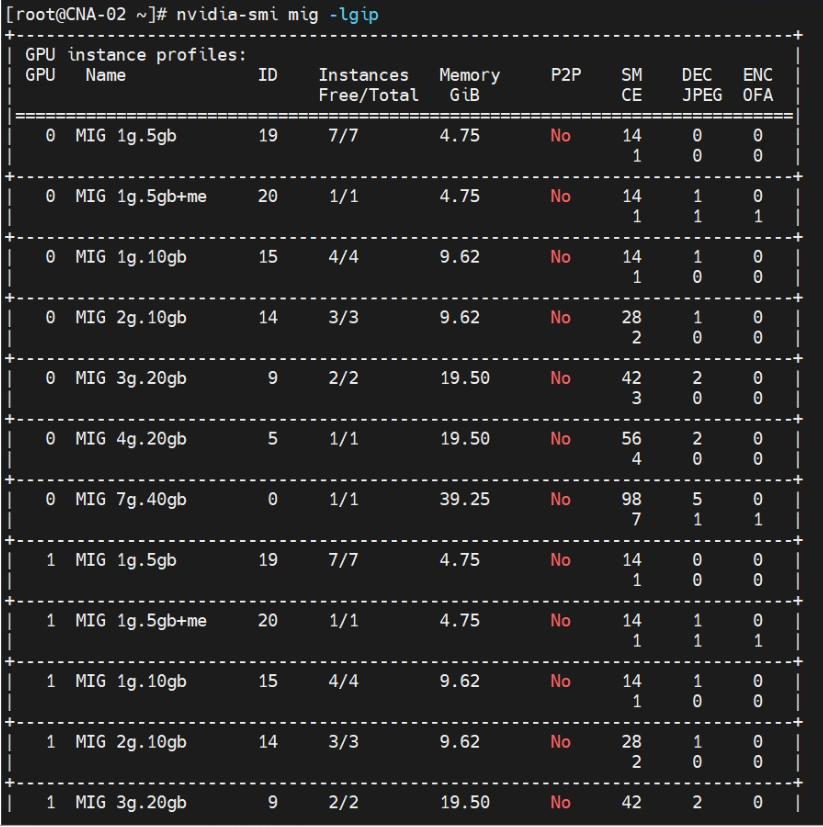
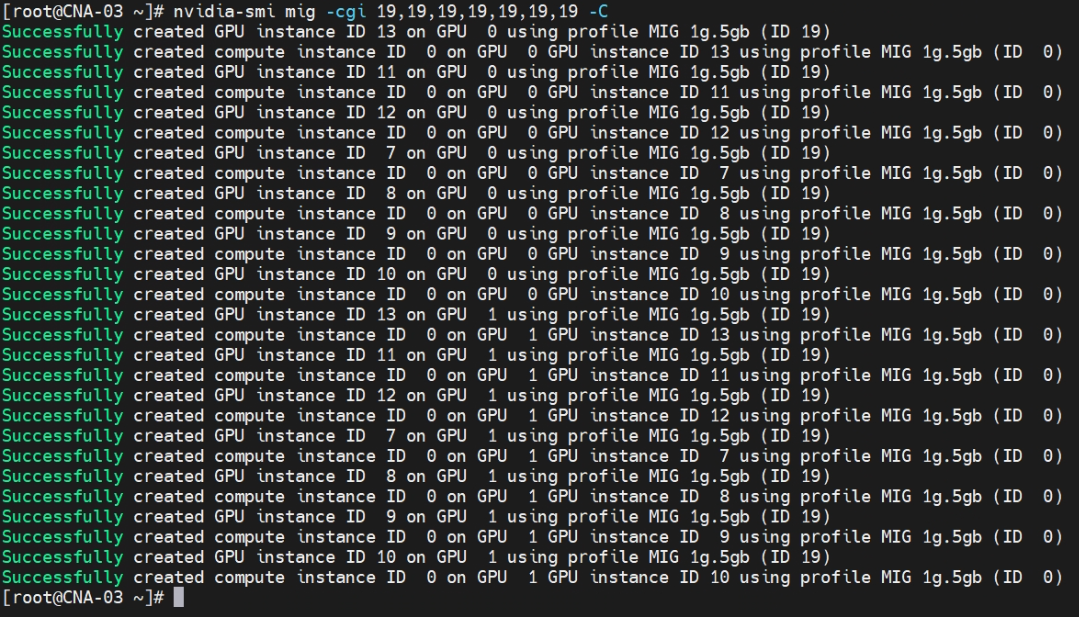
4. 创建 MIG 实例
假设 Profile ID 为 19
1
2
| nvidia-smi mig -cgi 19
nvidia-smi mig -cgi 19,19,19,19,19,19,19 -C
|
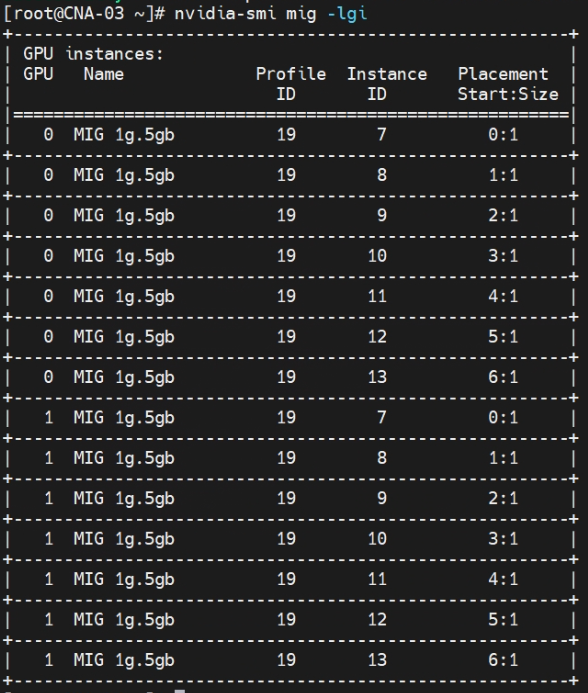
5. 确认实例已创建
二、安装gpu-device-plugin
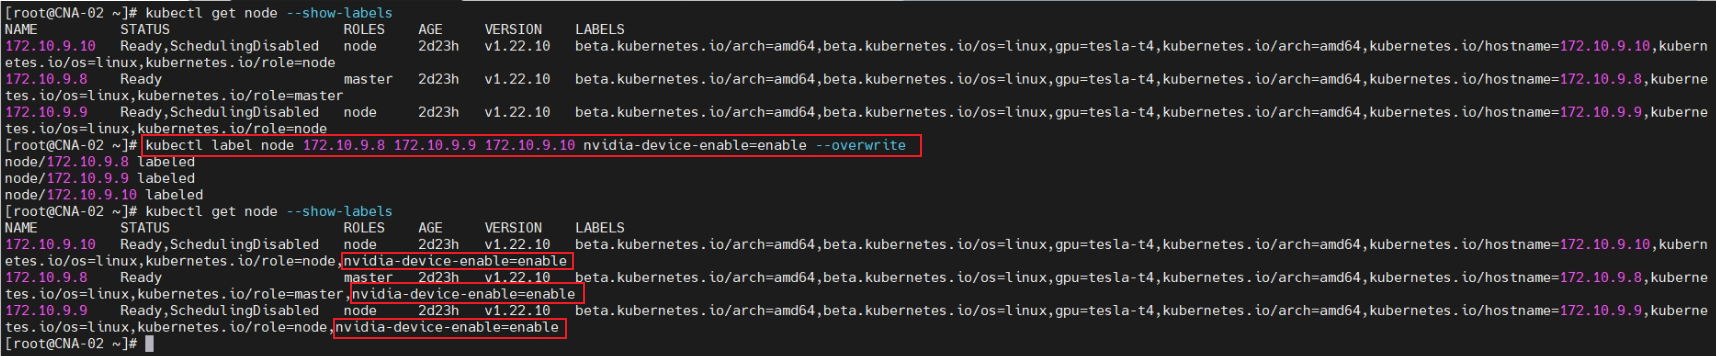
1. GPU节点打标签
1
| kubectl label node gpu-node01,gpu-node02 nvidia-device-enable=enable --overwrite
|
2. 安装GPU插件
vim device-plugin.yaml
1
2
3
4
5
6
7
8
9
10
11
12
13
14
15
16
17
18
19
20
21
22
23
24
25
26
27
28
29
30
31
32
33
34
35
36
37
38
39
40
41
42
43
44
45
46
47
48
49
50
51
52
53
54
55
56
57
58
59
60
61
62
63
64
65
66
67
68
69
70
71
72
73
74
75
| apiVersion: apps/v1
kind: DaemonSet
metadata:
name: nvidia-device-plugin-daemonset
namespace: kube-system
spec:
selector:
matchLabels:
name: nvidia-device-plugin-ds
updateStrategy:
type: RollingUpdate
template:
metadata:
labels:
name: nvidia-device-plugin-ds
spec:
nodeSelector:
nvidia-device-enable: "enable"
tolerations:
- key: nvidia.com/gpu
operator: Exists
effect: NoSchedule
priorityClassName: "system-node-critical"
containers:
- image: nvcr.io/nvidia/k8s-device-plugin:v0.19.2
name: nvidia-device-plugin-ctr
command:
- "/usr/bin/nvidia-device-plugin"
- "--mig-strategy=single"
env:
- name: NVIDIA_MIG_MONITOR_DEVICES
value: all
- name: NVIDIA_MIG_CONFIG_DEVICES
value: all
- name: NVIDIA_MIG_STRATEGY
value: single
- name: NVIDIA_LOG_LEVEL
value: info
securityContext:
privileged: true
allowPrivilegeEscalation: true
volumeMounts:
- name: kubelet-device-plugins-dir
mountPath: /var/lib/kubelet/device-plugins
- name: host-dev
mountPath: /dev
- name: nvidia-mig
mountPath: /var/lib/nvidia-mig
- name: lib-modules
mountPath: /lib/modules
readOnly: true
- name: usr-src
mountPath: /usr/src
readOnly: true
volumes:
- name: kubelet-device-plugins-dir
hostPath:
path: /var/lib/kubelet/device-plugins
type: Directory
- name: host-dev
hostPath:
path: /dev
- name: nvidia-mig
hostPath:
path: /var/lib/nvidia-mig
type: DirectoryOrCreate
- name: lib-modules
hostPath:
path: /lib/modules
type: Directory
- name: usr-src
hostPath:
path: /usr/src
type: Directory
|
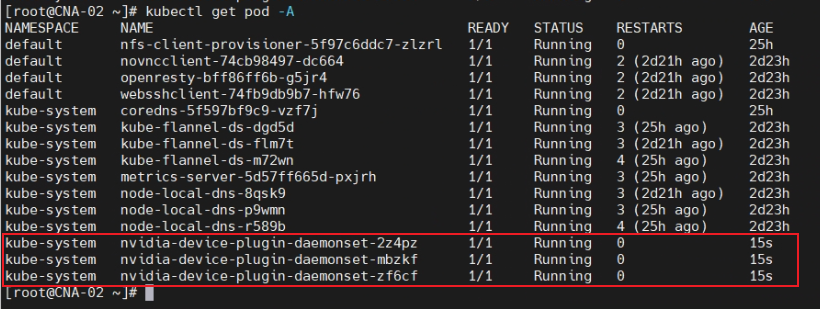
2. 执行安装
1
| kubectl apply -f device-plugin.yaml
|
查看
3. 查看节点GPU信息
1
| kubectl describe node 172.10.9.8
|
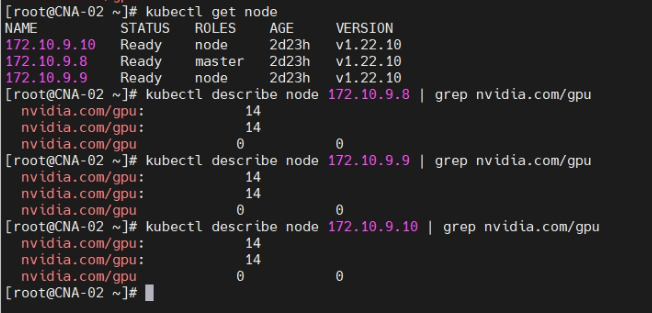 可以看到GPU节点信息正常。
三、(可选)不依赖平台测试容器引用GPU资源
1. 创建测试环境
vim gpu-test.yaml
apps/v11
2
3
4
5
6
7
8
9
10
11
12
13
14
15
16
17
18
19
20
21
22
23
24
25
26
27
28
29
30
31
32
33
34
35
36
37
38
| kind: Deployment
metadata:
name: gpu-test
labels:
app: gpu-test
spec:
replicas: 1
selector:
matchLabels:
app: gpu-test
template:
metadata:
labels:
app: gpu-test
spec:
containers:
- name: ubuntu-container
image: swr.cn-north-4.myhuaweicloud.com/tc-deliver-lab-amd64/ai-envs-x86_64:1.3.4.21
ports:
- containerPort: 61000
resources:
requests:
nvidia.com/gpu: "1"
limits:
nvidia.com/gpu: "1"
---
apiVersion: v1
kind: Service
metadata:
name: gpu-service
spec:
selector:
app: gpu-test
type: NodePort
ports:
- port: 61000
targetPort: 61000
nodePort: 31000
|
创建:
1
| kubectl apply -f gpu-test.yaml
|
2. 访问测试
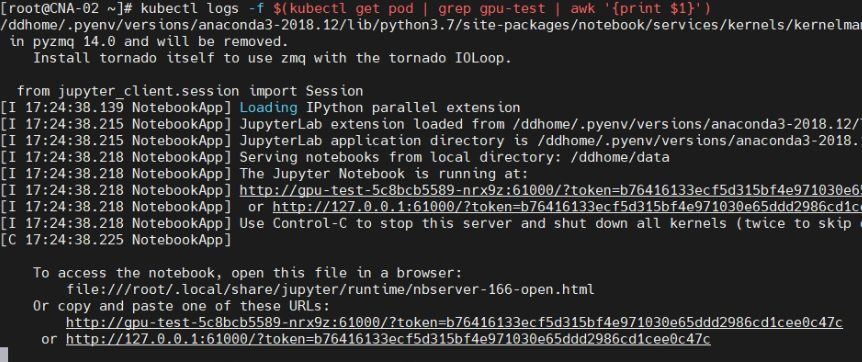
访问节点:http://:31000/?token=2ec7381f2d00c7cd7a0cf2b2163f86cd920d74906f3b7d21
token获取:
1
| kubectl logs -f $(kubectl get pod | grep gpu-test | awk '{print $1}')
|
打开对应内核测试代码
1
2
| import tensorflow as tf
tf.test.is_gpu_available()
|
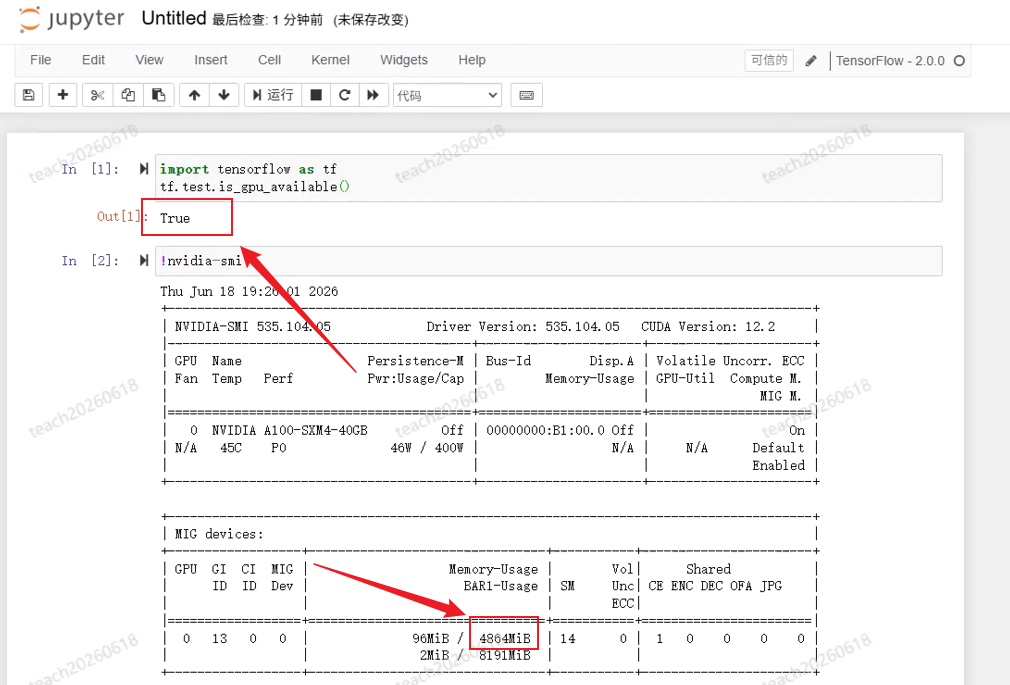
输出true及切分后大小即可。
— 结束